
As a homeowner, keeping your living space safe and healthy is a top priority. But what if lurking behind those walls or beneath the flooring is something that could harm you and your loved ones? Enter asbestlint—an insidious material that has been used in construction for its fire-resistant properties but poses serious health risks. If you’re worried about asbestlint in your home, you’re not alone. Many homeowners face this challenge head-on, unsure of where to start.
Whether you’ve just discovered it during a renovation or are taking proactive measures to safeguard your household, understanding how to handle asbestlint safely is crucial. This step-by-step guide will walk you through everything you need to know—from identifying asbestlint in your home to proper removal techniques. Let’s dive into this important topic so you can reclaim peace of mind and ensure a safer environment for everyone under your roof!
What is Asbestlint and Why is it a Problem?
Asbestlint, often referred to as asbestos tape or insulation, is a fibrous material commonly used in construction for its heat-resistant properties. It was widely employed in various applications, including pipe insulation and fireproofing.
The problem arises from the health hazards associated with exposure to asbestos fibers. When disturbed, asbestlint can release tiny particles into the air that are easily inhaled. This poses serious risks as these fibers can lead to severe respiratory issues and diseases like mesothelioma and lung cancer.
Many homes built before the 1980s may still contain this hazardous material. Homeowners often remain unaware of its presence until they embark on renovation projects or repairs. Understanding what asbestlint is and recognizing its potential dangers is vital for safeguarding your household’s health.
Health Risks Associated with Asbestlint Exposure
Asbestlint, often found in older buildings, poses serious health risks. This fibrous material can become airborne when damaged or disturbed. Inhalation of these fibers is where the danger lies.
Long-term exposure can lead to severe respiratory diseases such as asbestosis and lung cancer. Symptoms may take years to appear, which makes it particularly insidious. Even brief encounters with loose fibers can be harmful.
Individuals exposed to asbestlint are also at risk for mesothelioma, a rare but aggressive cancer linked directly to asbestos exposure. The latency period for this disease adds another layer of concern; symptoms might not manifest until decades later.
It’s crucial for homeowners to understand that even small amounts of disturbance can create a hazardous environment. Taking precautions seriously is essential for safeguarding your health and well-being against the hidden dangers of asbestlint.
Identifying Asbestlint in Your Home
Identifying asbestlint in your home can be a daunting task, but it’s crucial for your safety. Asbestlint typically appears as thin, fibrous material and may come in various colors, including white, blue, or brown.
Check areas where insulation is common. Basements, attics, and behind walls are typical places to find this hazardous substance. If you notice any peeling or frayed materials that resemble fabric-like fibers, it might be asbestlint.
Another telltale sign is the age of your property. Homes built before the 1980s often contain asbestos products. Be particularly cautious if you’re renovating or making repairs in older structures.
If you suspect you’ve found asbestlint but aren’t sure about its identification, consider hiring an expert for testing. Their trained eyes can confirm whether what you’ve found poses a risk to you and your family’s health.
DIY Removal vs Professional Removal
When it comes to asbestlint removal, homeowners often face a crucial decision: tackle the job themselves or hire professionals. DIY removal can seem appealing due to cost savings and a desire for hands-on involvement. However, handling asbestos is not like any regular home repair project.
Asbestos fibers are hazardous when disturbed, posing serious health risks if inhaled. Without proper training and equipment, you might unintentionally increase exposure levels in your home.
On the other hand, professional services come with expertise and safety protocols designed specifically for such tasks. Certified contractors have access to specialized tools and protective gear that ensure safe handling of asbestlint.
While hiring experts typically incurs higher upfront costs, the peace of mind they provide is invaluable. Evaluating your skills versus potential dangers will guide you towards making an informed choice about removing asbestlint from your space.
Step 1: Preparing for Removal
Before diving into the removal process, it’s essential to prepare adequately. Start by assessing the area where you believe Asbestlint is present. Clear any furniture and belongings to create a safe workspace.
Next, gather your supplies. You’ll need heavy-duty plastic sheeting to contain dust, duct tape for sealing edges, and marked disposal bags designed for hazardous materials. Having these items on hand will make the process smoother.
Ensure proper ventilation in your home during removal. Open windows if possible or use fans directed outside—but avoid creating drafts that could spread fibers throughout other areas of your house.
Inform anyone living with you about the project timeline. Keeping others away from the work zone minimizes exposure risk while you tackle this critical task safely and responsibly.
Step 2: Protective Gear and Safety Measures
When dealing with asbestlint, your safety is paramount. Before you begin any removal process, invest in the right protective gear. A high-quality respirator mask designed for asbestos work can help filter out harmful fibers that might be released into the air.
Don’t forget to wear disposable coveralls. These will keep your clothing free from contamination and prevent fibers from clinging to your skin. Make sure they fit well but aren’t too tight; comfort matters when working in a potentially hazardous environment.
Eye protection is also essential. Safety goggles can shield your eyes from dust and debris during removal.
Ensure proper ventilation in the workspace by keeping windows open or using fans directed outdoors, if possible. This helps minimize airborne particles while you work on asbestlint removal tasks effectively and safely.
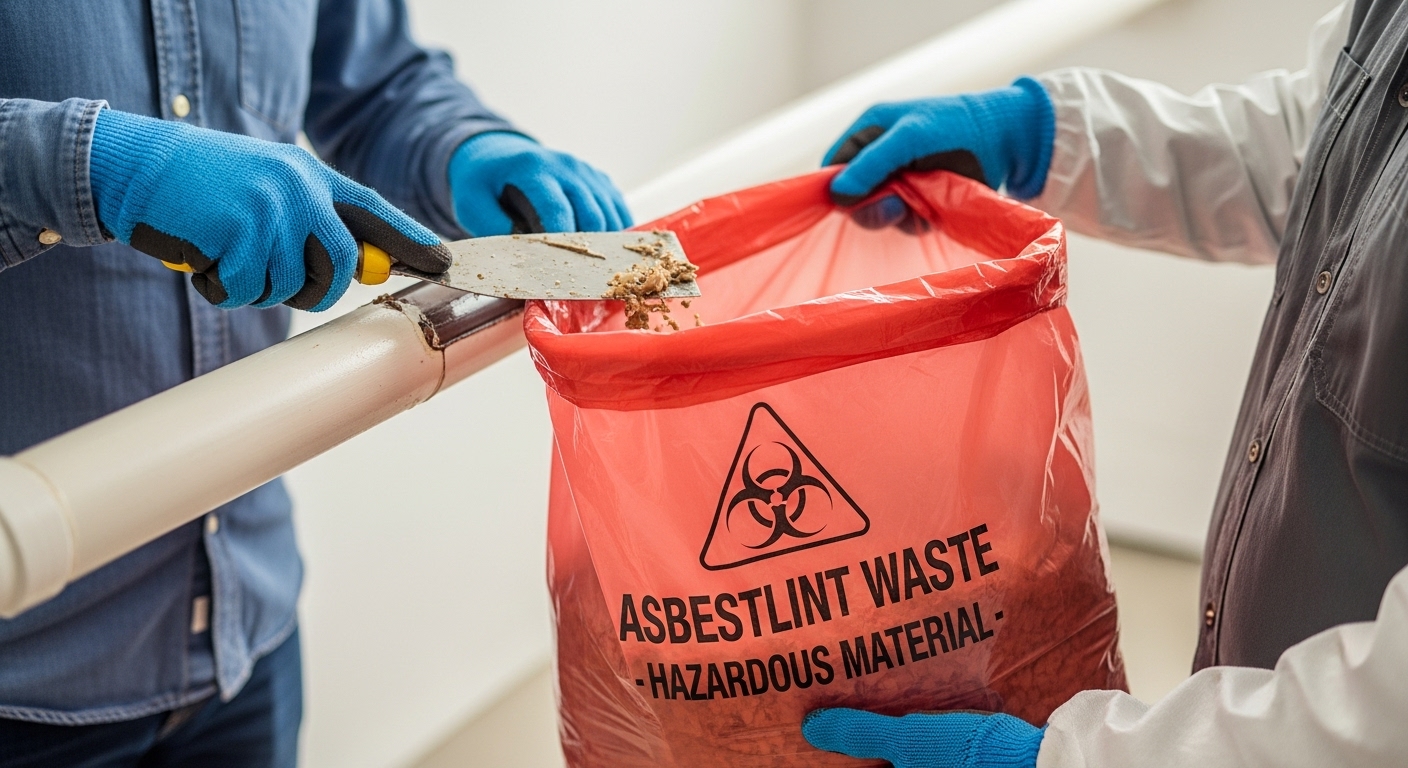
Step 3: Proper Disposal of Asbestlint Materials
Proper disposal of asbestlint materials is crucial for your safety and the environment. Start by sealing any collected debris in heavy-duty plastic bags or containers. This prevents fibers from becoming airborne during transport.
Label each bag clearly, indicating they contain asbestos materials. This alerts anyone handling them to exercise caution.
Next, check local regulations regarding hazardous waste disposal. Many areas have specific guidelines on how to dispose of asbestos safely and may require you to take it to a designated facility.
Do not attempt to throw these materials in regular trash bins. Improper disposal can lead to serious health risks for others and potential legal repercussions for you.
Always prioritize safety when transporting the material. Keep windows closed and limit exposure during transit, ensuring that no fibers escape into the air around you.
Final Steps and Post-Removal Cleaning
After successfully removing asbestlint from your home, there are important final steps to ensure the area is safe and clean. First, thoroughly vacuum the space using a HEPA filter vacuum specifically designed for hazardous materials. This will help capture any lingering fibers that may have escaped during the removal process.
Next, wipe down all surfaces with damp cloths or disposable wipes. Avoid dry sweeping or using brooms as this can stir up dust and potentially release asbestos fibers into the air. Focus on areas where you worked most intensively during removal.
It’s also wise to consider having an air quality test conducted in your home after cleanup. This step provides peace of mind by confirming that no harmful particles remain suspended in the air.
Once everything has been cleaned, properly dispose of all protective gear and disposal bags used during the removal process according to local regulations. Keep your environment clear from any debris related to asbestlint until you’re certain it’s completely eradicated.
By following these final steps, you’ll create a safer living space free from potential health risks associated with asbestlint exposure while feeling accomplished about tackling such a critical task in maintaining your home’s integrity.
